Do not disassemble your microscope
Disassembly may significantly affect the performance of the instrument, and may result in electric shock or injury and will void the terms of the warranty.
Never attempt to dismantle any parts other than the ones described below. If you notice any malfunction, contact your nearest Motic supplier.
Optics
Keeping the optics of your microscope clean is essential for obtaining clear images.
Choosing the best cleaning method depends on the nature of the optical surface and type of dirt.
Dirtiness on the image may be caused by the following variables:
- Dirt on the outer or inner eyepiece lens.
- Dirt on the front lens of the objective.
- Dirt on the upper lens of the condenser.
- Dirt on the surface of the sample slide glass.
- Dirt on the upper lens of illuminator.
- Dirt on other optical components of the microscope such as mirrors, lamps, filters, intermediate lenses …
In the case of microscopes with a camera attached to it:
- Dirt on the camera adapter.
- Dirt on the protection filter of the camera sensor.
For Eyepieces with reticules:
- Dirt on the outer or inner reticle glass.

Dirt image | Clean image
Objectives are the optical component of the microscope that require the most maintenance. Because for their actual use, they can get dirty easily.
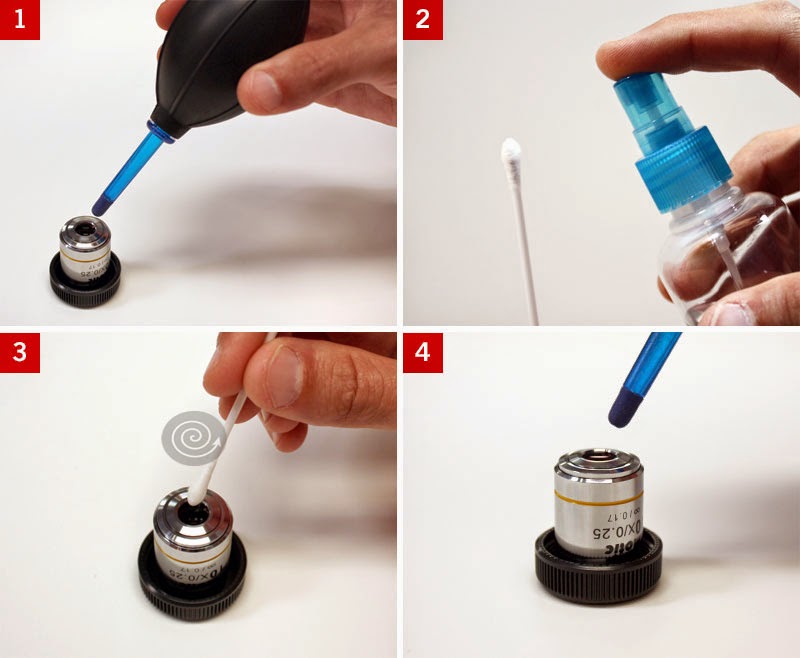
For objectives that work without oil (dry): The first step is to carefully unscrew the objective from the nosepiece.
In order to make things easier and safer, we can screw the objective on one of the objective cases supplied with microscope. By doing it this way, the objective will be in a stable position avoiding possible falls.
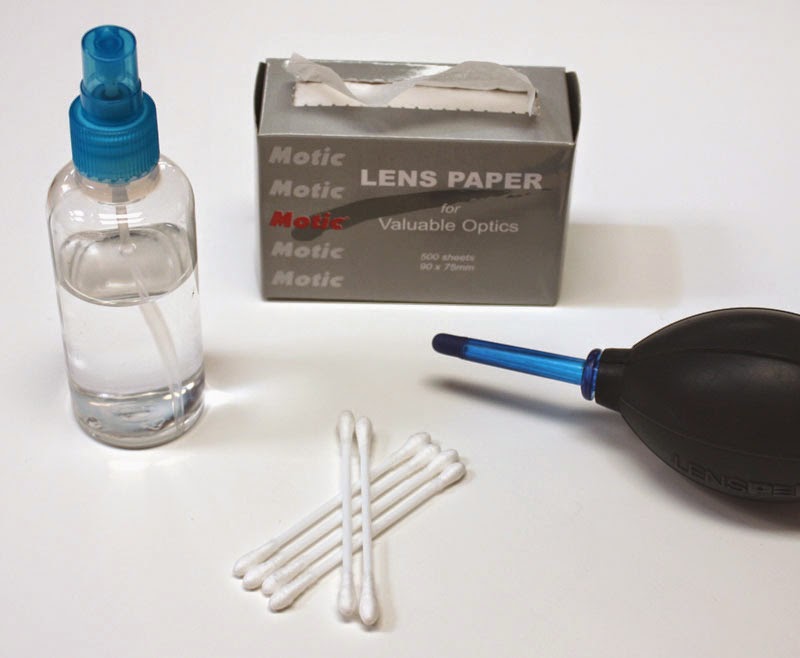
1 We will proceed by cleaning it using pressurized dry air - or an air gun if available – and, if after this is done we still observe spots of dust or dirt,
2 We will clean them with a cotton swab dampened with a low graduation of alcohol 70% or with a mixture of alcohol and ether (ratio alcohol: 3 and ether: 7).
3 With a spiral movement (starting from the center of the lens) we will then clean the surface of the lens.
4 We will then dry its surface by using pressurized dry air and we will check that the lens is clean either with the help of a magnifying glass or by screwing the lens back on the revolving nosepiece of the microscope.


For objectives that work with immersion oil it is essential to clean them after each observation session. To clean it we will use a cleaning cloth for lenses slightly dampened with a low graduation of alcohol. We will proceed by cleaning the frontal objective lens (normally 100X-Oil or 50X-Oil). It is important to make a preventive maintenance also for those objectives that work at a very close distance to the sample. With this we mean the 40X and 60X objectives, which may accidentally get in contact with the immersion oil.
Users of inverted biological microscopes have to take special care with the objectives because they can get dirty with dust or liquid that spills from the sample/s. In this case we recommend you check the status of the objectives accurately at least once a week.
For optical components such as eyepieces, condensers, filters, etc. we recommend using the same cleaning method. First cleaning it with pressurized dry air, then cleaning it with a cotton swab or a cleaning cloth for lenses (slightly moistened with a low graduation of alcohol) and finally drying it with pressurized dry air.
Once the cleaning process is finalized if the image is still not clear, you can either contact us or you can contact your Motic supplier.
For users that have a digital camera mounted on the microscope and whom observe dirt on the digital image, it is important that the first step is to proceed with objectives maintenance, as explained above. If the dirt persist, we have to find out if it has to do with the microscope or the camera. To check this we simply have to loosen the adapter and rotate the camera. If the dirt rotates whilst turning it, then it means that it is in the microscope. If it does not rotate, then it is either in the adapter or in the protection filter of the sensor. If the dirt is on the surface lens of the adapter then you can use the same cleaning method that we have explained above, but if the dirt is in the protection filter of the sensor then use pressurized dry air only. If the dirt persist you can either contact us or you can contact your Motic supplier.
Mechanics
The mechanical components of the microscope require less maintenance than the optical components. Our first maintenance advice is to use the dust cover provided with the microscope, this way we will avoid the accumulation of dust on the microscope.
If we wish to clean the stand or the specimen holder, we will simply use a cleaning cloth moistened with soap diluted in distilled water. After this we will proceed in perfectly drying the entire surface of the microscope. You have to take special care with the electrical components of the microscope such as the ON / OFF switch, the dimmer, the lamp holder…
If there are grease stains we can use the same cloth moistened with a low graduation of alcohol.
If you face any problems related to the maintenance of your microscope, please contact us. Our technicians will gladly help you solve your maintenance issue/s.
